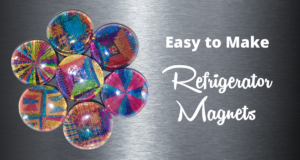
These are so much fun to make and the possibilities are endless. You can use patterned cardstock, stickers or even a photo to make these highly customized. They also make great gifts.
Supplies
-
- 30MM Magnets
-
- 30MM Floral Marbles
-
- Modge Podge
-
- Decorative scrapbook cardstock, photo, or sticker of your choice
-
- E-6000 or Hot Glue (my preference is E-6000 as I find it is stronger for this application)
-
- 1″ Circle Hole Punch (Optional)
-
- Scissors
Instructions
-
- Use the circle hole punch to punch out a hole around the area you want to showcase on your magnet. If you don’t have a hole punch you can trace around one of the glass “gems” with a pencil and cut with a scissor
- Apply Mod Podge to both the cut out circle and the back of one of the gems.
- Stick the circle onto the glass gem.
- Let dry (20 – 30 minutes
- Glue the magnet on to the gem with the E-6000.
- Display proudly!


This is the coolest idea and educational too! My friend Jen told me about this. They have a number of nieces and nephews and they thought it would be a great project to decorate a sign post for their garden. Each child was provided with a slab of wood and some outdoor paint samples. They each decorated their own and added the distance that they live from Jen and Rick. They then nailed the posts onto a pole pointing in the right direction towards their respective houses. So clever!
Supplies
-
- Scrap wood planks
-
- Outdoor paint assorted colors
-
- Brushes
-
- Hammer and nails
-
- Post to hammer the slabs to when done
Instructions
-
- Provide each child with their own slab of wood to decorate.
-
- Once dry use a compass to determine the correct direction to point the slab.
-
- Sit back and enjoy!


This is an oldie but a goodie. I loved making homemade Playdough as a kid. This is an improved recipee which is softer and lasts longer than the ones I used to make.
Ingredients
-
- 2 cups all-purpose flour
-
- 3/4 cup salt
-
- 4 teaspoons cream of tartar
-
- 2 cups lukewarm water
-
- 2 Tablespoons of vegetable oil (coconut oil works too)
-
- Food coloring, optional
-
- Glitter (optional)
-
- Scent (optional) – Essential oils such as peppermint or lavendar work great!
-
- Quart sized bags
Instructions
-
- Stir together the flour, salt and cream of tartar in a large pot.
-
- Add the water and oil.
-
- While constantly stirring, cook over medium heat.
-
- Keep stirring until the dough has thickened and begins to form into a ball.
-
- Remove from heat and place inside a gallon sized bag or onto wax paper.
-
- Allow to cool slightly
-
- Knead until smooth.
-
- If you’re adding colors after, divide the dough into balls (one for each color)
-
- Add the dough into the quart sized bags.
-
- Punch a hole in the dough and start with about 5 drops of color. Add more color for more intensity.
-
- Knead the dough, while inside the bag so it doesn’t stain your hands.
-
- Once mixed you can play!
Optional: You can add glitter to make the dough more sparkly. You can also add essentials oils such as peppermint, lavender or lemon to give the dough a really nice scent.


I love making these with kids! They really enjoy picking out the different scents and colors and they can really get creative! Mixing colors and adding additional embellishments such a sugar cake decorations makes each one truly unique. The packaging can even be creative using shrink plastic and pretty bows!
Supplies
-
- 1 cup baking soda
-
- 1/2 cup citric acid
-
- 1/2 cup Epsom salt
-
- 1/2 cup cornstarch
-
- 3/4 tsp. water
-
- 2 tsp essential oil (lavender, eucalyptus, patchouli or peppermint are great choices)
-
- 2 tsp oil (jojoba, sweet almond, coconut, or olive oil)
-
- A few drops of food coloring
-
- A mold such as a muffin tin, small bowl, or round plastic or metal molds designed for bath bombs
-
- Optional: Dried flowers or sugar cake decorations (such as flowers, hearts or stars)
Instructions
-
- With the exception of the citric acid, mix the dry ingredients in a large mixing bowl.
-
- Pour all liquid ingredients in a jar with a top. Close the jar and shake it vigorously.
-
- Pour the liquid mixture into the bowl of dry ingredients, and use your hands to mix it well. At this point, add the citric acid. You’ll probably notice a slight fizzing reaction when adding the citric acid. This is normal.
-
- The mixture should be a bit crumbly (similar to the consistency of wet beach sand). Don’t add water at this stage, or the bath bomb will fizz prematurely and be ruined.
-
- Mash the mixture into your chosen molds very tightly. You may slightly overfill the molds and use a spoon or glass to press the mixture in as tightly as possible. Immediately loosen the bombs from their molds onto wax paper and let them dry overnight.
-
- Give them another day or 2 to completely dry before using them or wrapping them up as gifts.

Supplies
-
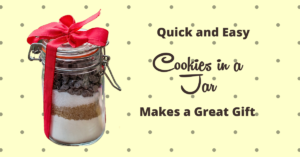
- Mason jar
-
- Fabric and ribbon to decorate
Ingredients
-
- 1 3/4 cups all-purpose flour
-
- 3/4 teaspoon baking soda
-
- 3/4 teaspoon salt
-
- 1 1/2 cups (9 ounces) chocolate chips
-
- 3/4 cup packed brown sugar
-
- 1/2 cup granulated sugar
Instructions
-
- Combine flour, baking soda and salt in small bowl.
- Place flour mixture in 1-quart mason jar.
- Layer remaining ingredients in order listed above – Be sure to press firmly after each layer.
- Seal with lid and decorate with fabric and ribbon. You can even paint the jar with glass paint or decorate with colored permanent markers to truly make this gift one of a kind.
Make a tag with the following directions to attach to the jar with twine. This can be hand written or printed. I usually use craft paper and handwrite to make it even more personal.
Preheat oven to 375° F. Beat 3/4 cup (1 1/2 sticks) softened butter or margarine, 1 large egg and 3/4 teaspoon vanilla extract in large mixer bowl until blended. Add cookie mix and 1/2 cup chopped nuts (optional); mix well. Drop rounded tablespoon onto ungreased baking sheets. Bake for 9 to 11 minutes or until golden brown. Cool on baking sheets for 2 minutes. Move to wire racks to cool completely. Makes about 2 dozen cookies.
Please note that this post includes Amazon affiliate links. If you purchase any of these items I will receive a small commission at no additional cost to you. Thank you!

